data2check documentation – General part
Table of contents
1. Why data2check?
With the help of the free service data2check, Word, InDesign and EPUB files can be checked for correctness.
Word documents are checked for compliance with the styles used (paragraph and character styles). In this way, important copy-editing guidelines of publishing houses or companies can be controlled. Furthermore, a document can be examined for Word-specific components making further processing much more difficult (e.g. text boxes, pictures, charts, etc.). InDesign documents can be checked for created paragraph and character styles but also for constructs making the export from InDesign to the EPUB format impossible.
After completion of a check, any errors found can be tracked with the help of comments in the output document. In addition, the uploaded data is stored as XML files in a database where they are available at any time.
Due to these features, data2check is a useful and time-saving tool not only for employees of publishing companies or technical writers, but also for authors in order to control the quality of their documents.
2. Registration
You can access the login page of data2check via the URL service.data2check.de/login (see figure 1).
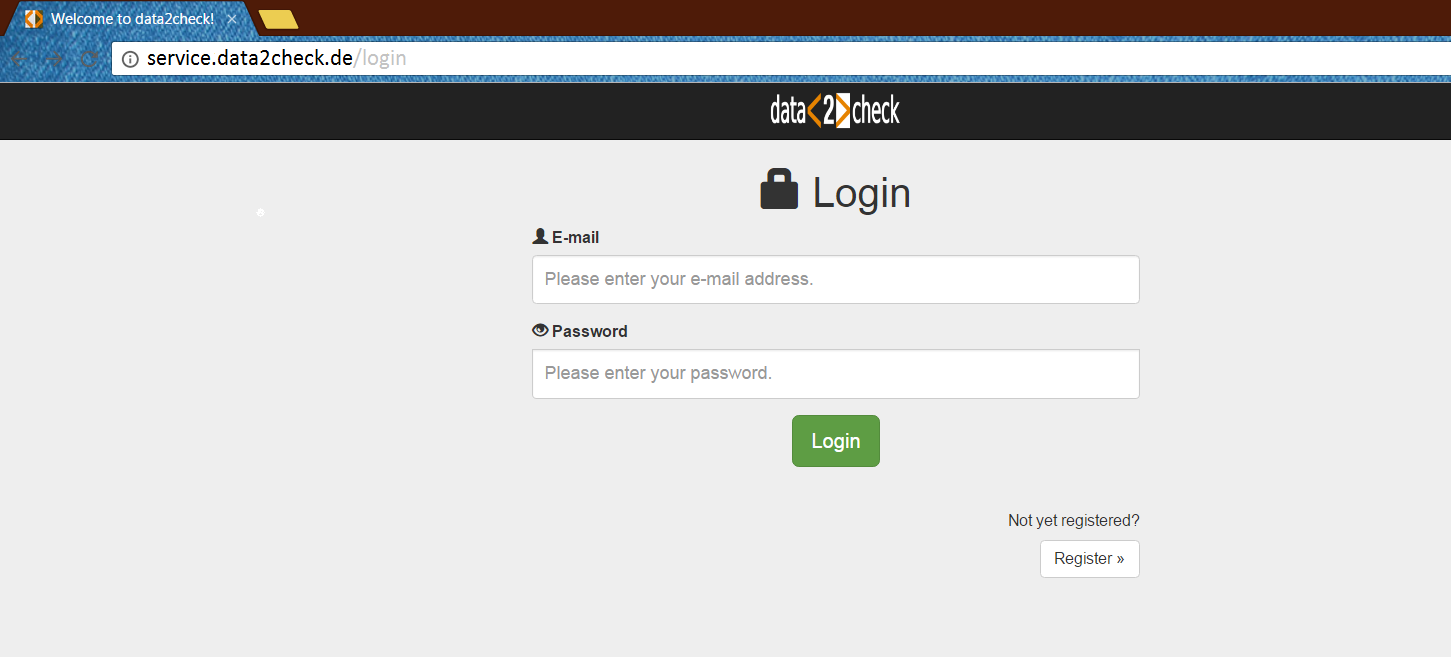
Figure 1: data2check login.
First of all, you must register for data2check before you can log in. Registration is done by clicking the »Register« button on the bottom right (see figure 2).
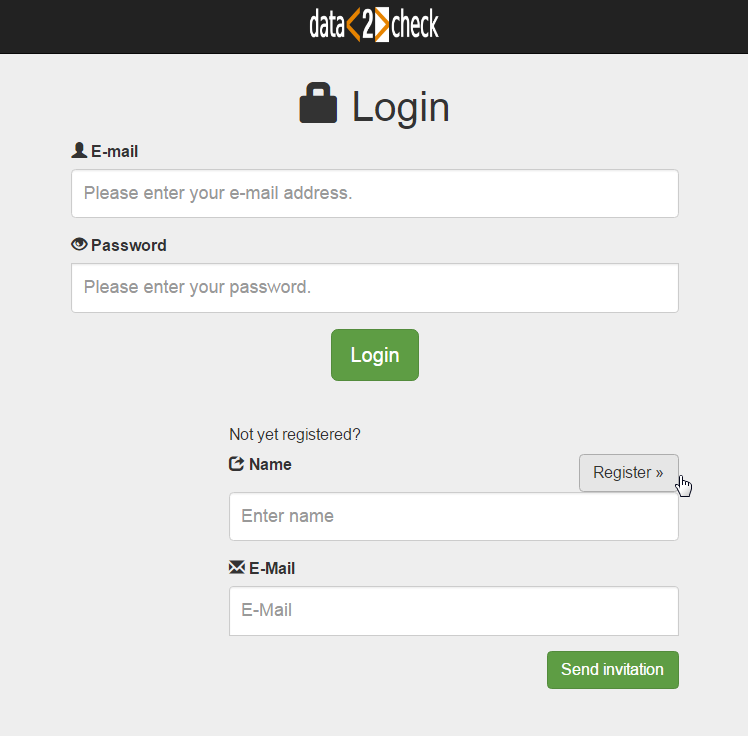
Figure 2: Registration for data2check.
Please enter your name in the »Name« input field and a valid e-mail address in the
»E-mail« input field. Then click the »Send invitation« button. Shortly afterwards,
you receive a registration e-mail from noreply@data2check.de with the subject "Invitation for data2check" to the e-mail address provided by you
(see figure 3).
NOTICE: Please also check your spam folder for the registration e-mail!

Figure 3: Registration e-mail from data2check.
After following the confirmation link in the e-mail, you arrive at the »Create account« page of data2check (see figure 4).
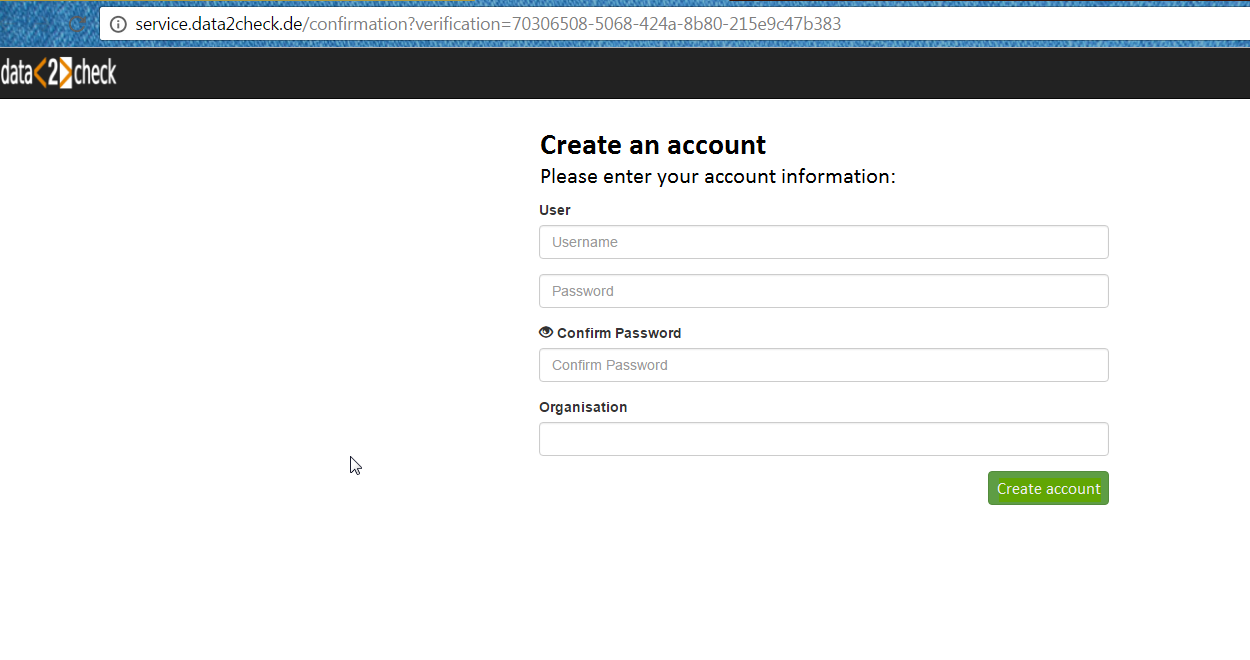
Figure 4: Create your data2check account.
Please enter your desired user name for data2check in the »User name« field. In the »Password« field, please enter your desired password, which you enter again in the »Confirm password« field for confirmation. In the »Organisation« field you may optionally enter the name of a "group", e.g. the name of your project group, your company name, etc. In this way, you also become the manager of this group. This feature is described in detail under 4.4 User management.
Next, click the »Create account« button. After successful registration, you will access the data2check login page (see figure 5).
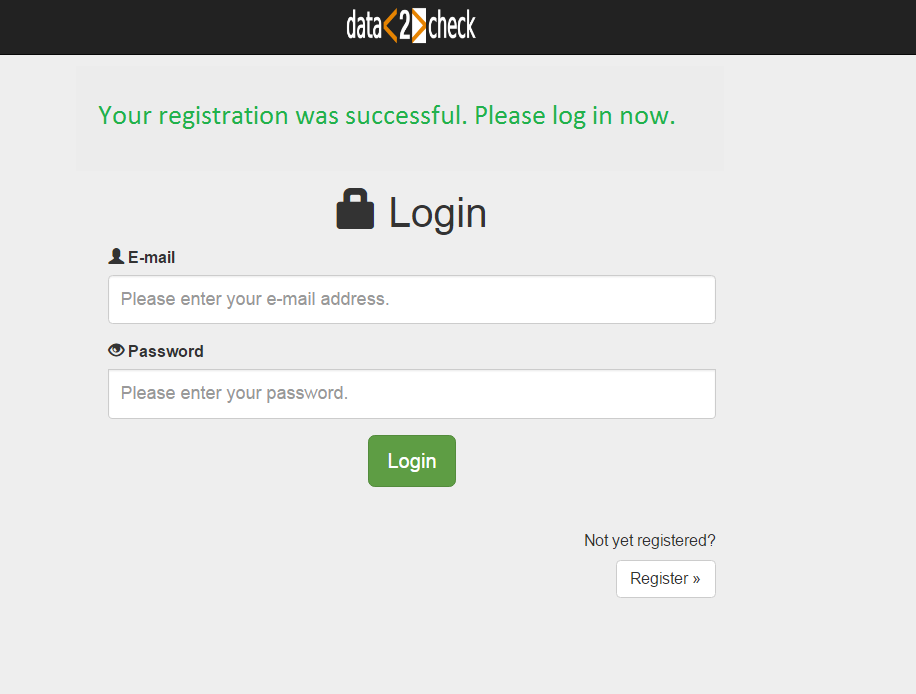
Figure 5: Successful registration for data2check.
3. Login
You can login for data2check under the URL service.data2check.de/login (see figure 1) by entering your e-mail address, your password and then clicking the »Login« button.
After logging in successfully, you will get to the start page of data2check (see figure 6) and to the main menu.
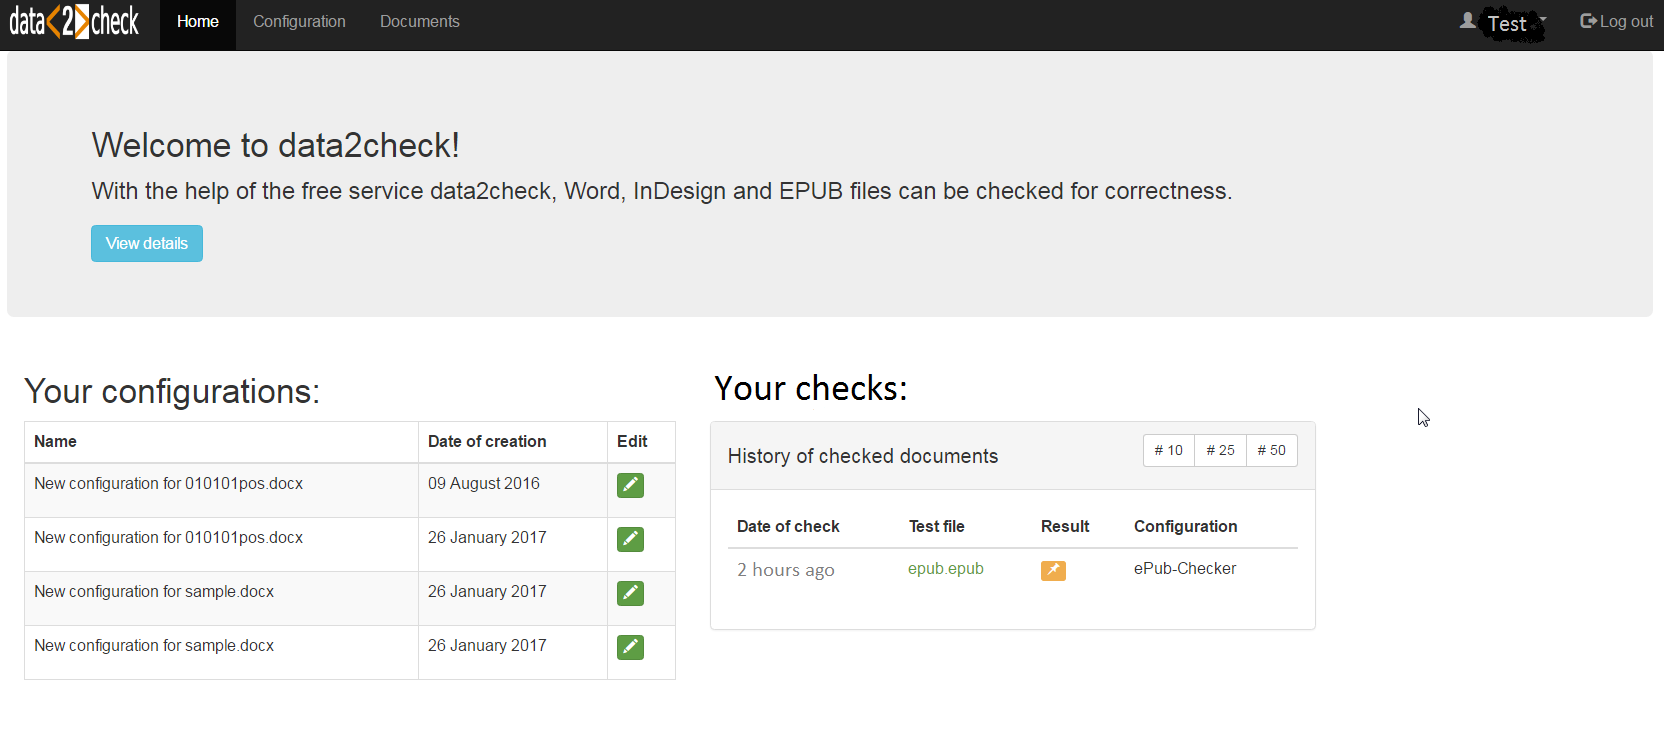
Figure 6: The data2check start page.
4. The main menu
The data2check main menu (see figure 7) consists of the menu options »Home« (start page), »Configuration« and »Documents« (top left) as well as of the menu options »User« and »Logout« (top right).

Figure 7: The data2check main menu.
The following sections offer a brief introduction of the components and functions of the individual menu options.
4.1 Home
On the start page of data2check you find a short introduction text which can be expanded by clicking the »View details« button. Under »Your configurations:« in the bottom left part of this page you find a chronological list of your already created configurations for checking Word or InDesign documents. Under »Checked documents:« in the bottom right part you can find your "History of checked documents". Here, all of the documents already checked and the results are listed chronologically.
If you are logged in for the first time, of course, both tables mentioned are still empty (see figure 8).
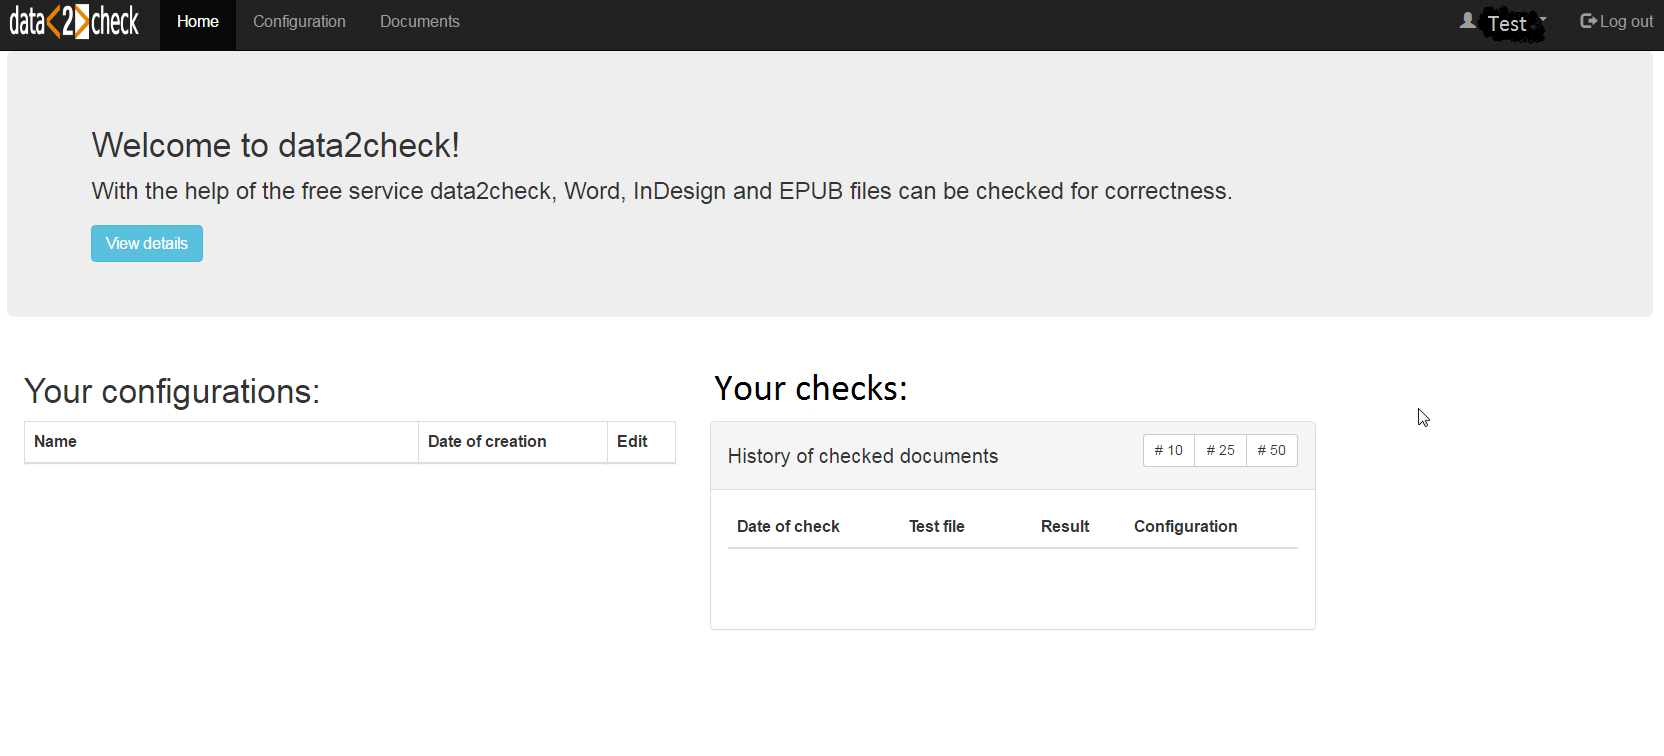
Figure 8: (Still) empty start page of data2check.
If you have already created configurations or checked documents, both tables are filled with content (see figure 9).
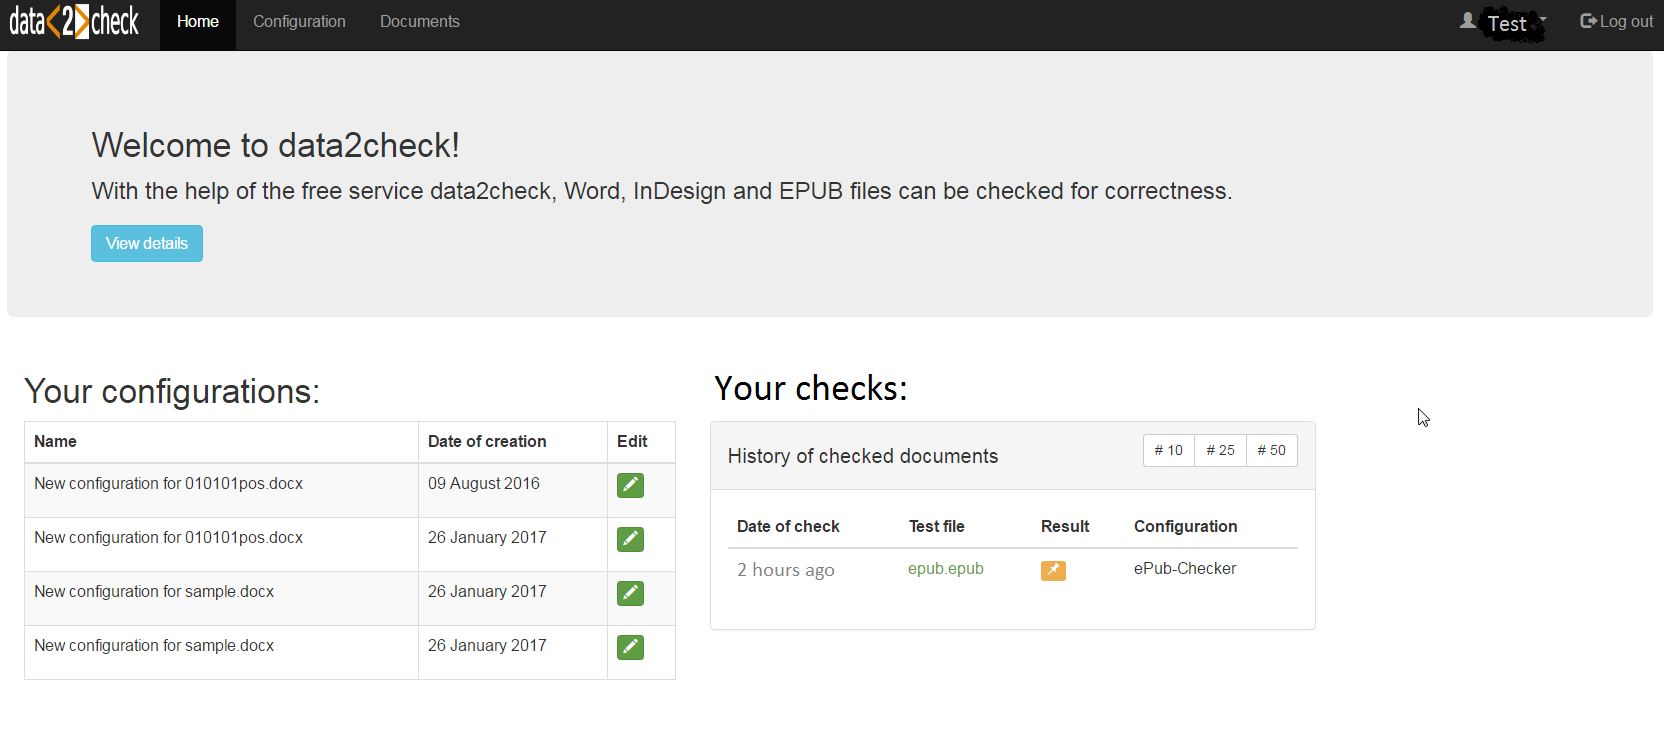
Figure 9: Start page of data2check with entries on checked documents.
The table under »Your configurations:« consists of three columns. Under the »Name«
column the name of your created configuration for checking Word or InDesign documents
is listed. By default this name consists of the words "New configuration for" plus
the name of your used template file (including the file format: .docx or .idml). Further
informationen on changing the configuration name can be found under Checking a Word document - 2.1 The Configuration Info for Word or under Checking an InDesign document - 2.1 The Configuration Info for InDesign. In the second column the date on which you have created the configuration
is listed. In the third column you can edit the individual configurations by clicking
the green pen button (![]() ). Further informationen on editing a configuration can be found under the menu option
»Configuration«.
). Further informationen on editing a configuration can be found under the menu option
»Configuration«.
The table under »Checked documents:« consists of four columns and represents the History of checked documents. Here, all checks already carried out are listed in chronological order and you have also access to the individual check results. Therefore, the History of checked documents represents your personal database.
In this table all previous checks are listed including the time of the check (»Date
of check«), the name of the file to be checked (»Test file«), the result of the check
(green check icon (![]() ) for "successful check and no errors found", orange pin (
) for "successful check and no errors found", orange pin (![]() ) for "successful check but errors found" and red flash (
) for "successful check but errors found" and red flash (![]() ) for "check has failed, e.g. due to a system error") as well as the configuration
used for the individual check.
) for "check has failed, e.g. due to a system error") as well as the configuration
used for the individual check.
By clicking one of the documents linked under »Test file«, you reach the individual output documents of the respective check. Further information on this feature can be found under the menu option »Documents«.
Further informationen regarding the History of checked documents can be found under Checking a Word document - 4. The history of checked documents for Word, under Checking an InDesign document - 4. The history of checked documents for InDesign, under The InDesign-to-EPUB Check - 3. The history of checked documents or under The EpubCheck - 3. The history of checked documents.
4.2 Configuration
Under this menu option configurations for checking Microsoft Word or Adobe InDesign documents can be created and edited.
On the left-hand side you can upload new configurations as well as access configurations already created in the past.
On the right-hand side you can find the "Configuration Management" consisting of several tabs. Here, configurations can be found, edited and deleted.
Further informationen on creating a configuration for checking documents can be found under Checking a Word document - 1. Creating a configuration for Word as well as under Checking an InDesign document - 1. Creating a configuration for InDesign. The options for editing a configuration are explained in more detail under Checking a Word document - 2. Editing a configuration for Word as well as under Checking an InDesign document - 2. Editing a configuration for InDesign.
4.3 Documents
Under this menu option the check of a document will be initiated after uploading a file to be checked (Word, InDesign or EPUB) and the selection of a required configuration. Here, you will also find the output documents of the individual checks.
Further information on checking a document can be found under Checking a Word document - 3. Checking a document for Word, under Checking an InDesign document - 3. Checking a document for InDesign, under The InDesign-to-EPUB Check - 2. Checking a document or under The EpubCheck - 2. Checking a document.
4.4 User management
On the right-hand side of the main menu you can find the user management (see figure 10, orange circle).
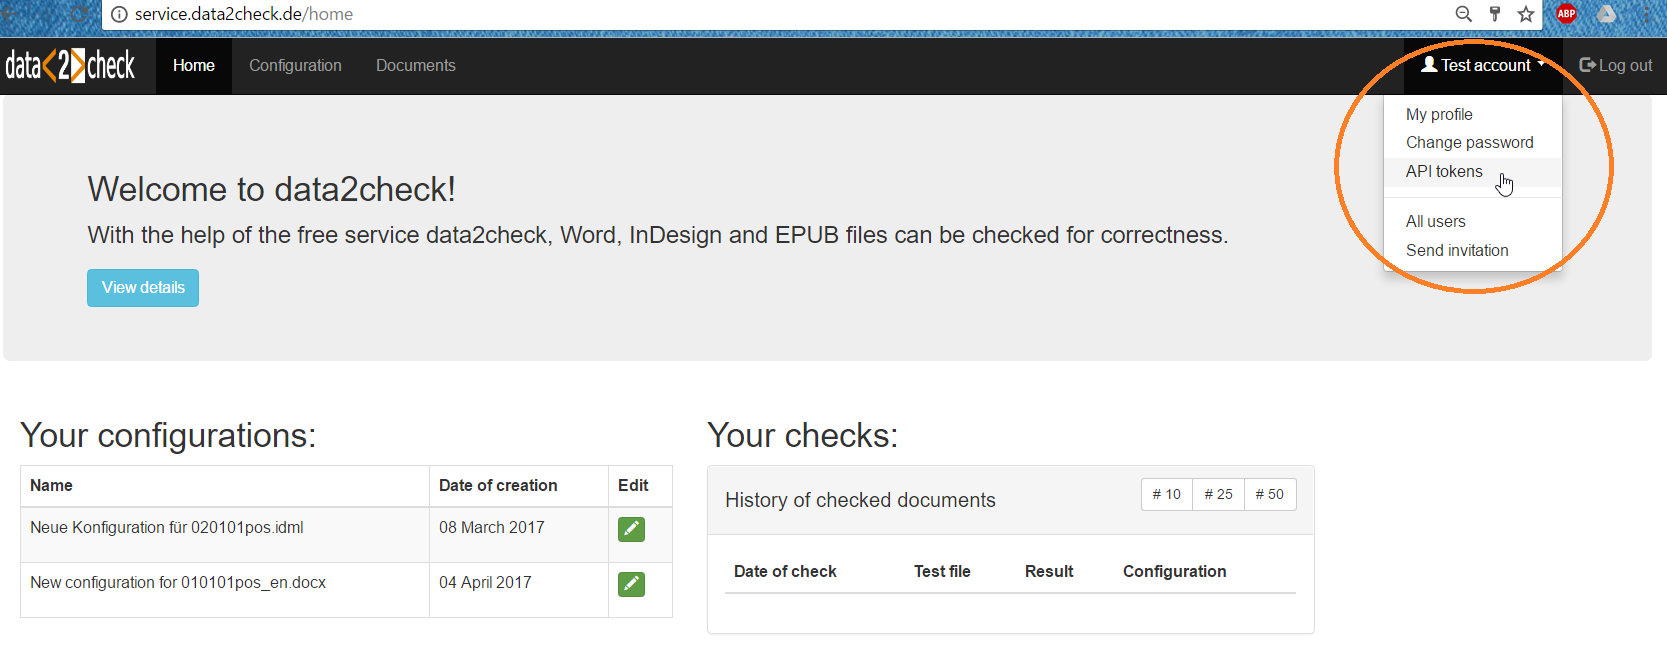
Figure 10: The data2check user management.
Under this menu option you have the possibility to edit your profile, change your password and to create an API token as well as to edit the users of your "group" and invite new users to your group.
Next to the user icon the words "Test" can be read because this is the user name used in this example case. In your case, the user name selected by you when creating the account for data2check (see figure 4 under 2. Registration) appears next to the user icon.
4.4.1 My profile
On the »My profile« page (see figure 11) you can change your user name .

Figure 11: User settings under »My profile«.
PLEASE NOTE: The e-mail address used in figure 11 (and later also in further figures) is made unrecognizable for reasons of data protection.
In order to change your user name, please delete the old one from the »User« field and enter your new user name. Then cklick the »Save« button. Now, your user name was changed (see figure 12).

Figure 12: A new user name has been saved.
By clicking the »All users« link, you will reach the »All users« page.
4.4.2 Change password
On the »Change password« page (see figure 13) you can change your password for the data2check login.
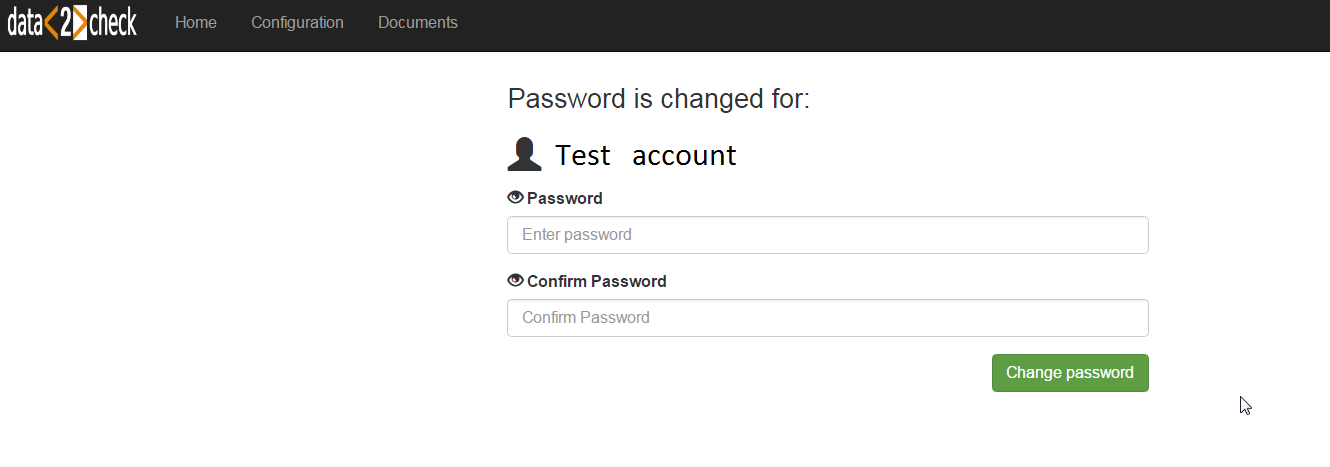
Figure 13: Changing the password for data2check.
Simply enter your new password in the »Password« field as well as in the »Confirm Password« field (required for confirmation) and then click the green »Change password« button. After successfully saving the new password, the message »Your password has been successfully changed.« appears (see figure 14).
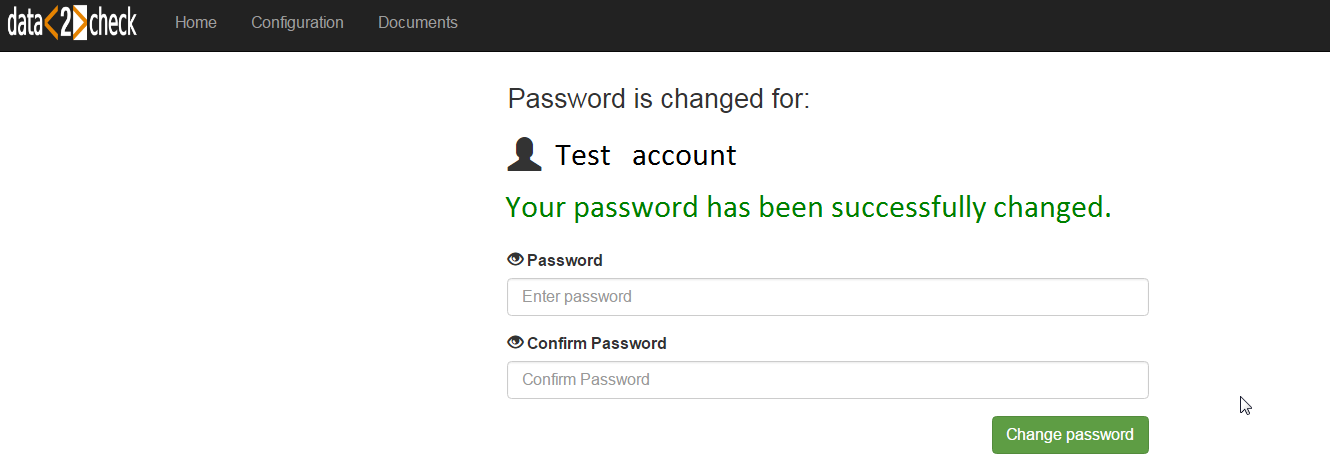
Figure 14: The password has been successfully changed.
NOTICE: Please use your new password for the next time you log in!
4.4.3 API tokens
On the »API tokens« page you can manage the tokens for the data2check REST API. Further informationen on this type of check for the integration into own services can be found under Using the API.
4.4.4 All users
On the »All users« page all members of your "group/organisation" including the respective user names (»User«) and the e-mail addresses used (»E-mail«) are listed. In case you did not have invited any members to your group yet (see under 4.4.5 Send invitation), only your own profile is indicated here (see figure 15).

Figure 15: List of the members of a group.
Here, you can edit and delete users being members of your "group".
In order to edit a user, please click the green pen icon (![]() ) in the appropriate row. An input mask appears where you can change the user name
(»User«)
of the selected user of your group (see figure 16).
) in the appropriate row. An input mask appears where you can change the user name
(»User«)
of the selected user of your group (see figure 16).

Figure 16: Editing a member of your group.
Regarding the editing possibilites of a group member, see also the information under 4.4.1 My profile.
In order to delete a user from your "group", please click on the red trash icon (![]() ) in the appropriate row.
) in the appropriate row.
By clicking the green »+« button in the top-right corner, you can add a new user to your group list (see figure 17, orange circle).

Figure 17: Adding a new user.
Now, an input mask for creating a new user appears. Please enter the desired user name in the »User« input field and the valid e-mail address of the new user in the »E-mail« input field. Then click the green »Create« button (see figure 18).

Figure 18: Creating a new user.
Afterwards, the newly created user can be found in your user list on the »All users« page (see figure 19).

Figure 19: The newly created user under »All users«.
4.4.5 Send invitation
On the »Send invitation« page you have the possibility to invite people to your "group" or "organisation" (see figure 20).

Figure 20: Sending an invitation for data2check.
Please enter the name of the person you want to invite in the »Name« input field and the person's valid e-mail address in the »E-Mail« input field. Then click the »Send invitation« button. Shortly afterwards, the person invited by you receives a confirmation e-mail from noreply@data2check.de with the subject "Invitation for data2check" to the e-mail address provided by you (see also figure 3).
After following the confirmation link in the e-mail, the invited person arrives at the »Create account« page of data2check (see figure 4). Now, the invited person is able to register and to log in (see under 2. Registration and 3. Login).
4.5 Logout
The logout can be found on the right-hand side of the main menu (see figure 21, orange circle).

Figure 21: Logout for data2check.
By clicking »Log out«, you log off data2check and the login mask appears (see figure 22).
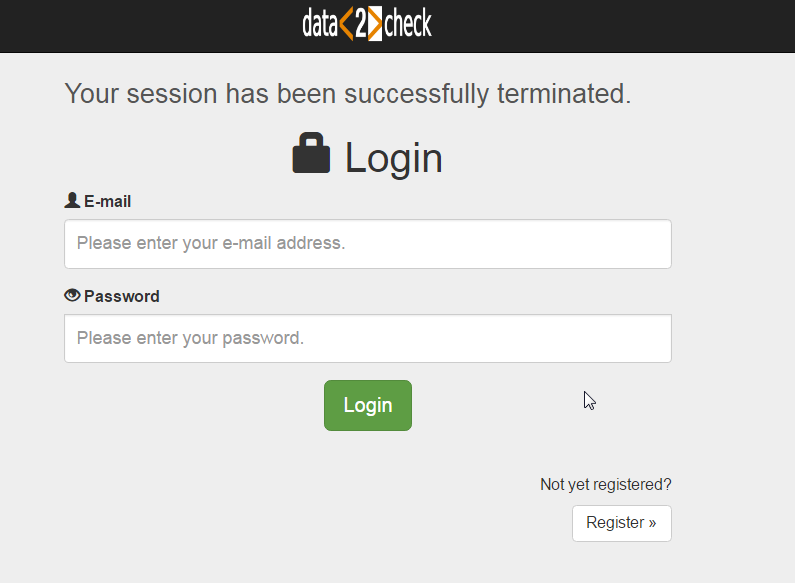
Figure 22: Successful data2check logout.
When required, you can again login for data2check (see under 3. Login).